Keeping your Garmin G1000 databases up to date is a simple but essential part of safe and efficient flying. Navigation databases are updated every 28 days on the AIRAC cycle. Here's how to update yours using Garmin Aviation Database Manager.
Browse Aircraft Equipped with the Garmin G1000

There are two distinct steps when updating your G1000:
- Download and install data to SD cards using Garmin Aviation Database Manager.
Upload data to the aircraft.
Step 1: Login to your account at www.flygarmin.com.
Log into your FlyGarmin account to ensure your aircraft and database subscriptions are active and up to date. This is also where your aircraft tail number and eligible downloads are managed.

Step 2: Insert SD Card(s) into your computer.
Remove the SD card(s) from your aircraft and insert them into your computer's SD card reader.
Most G1000 systems use:
- A top slot card (typically for Navigation Data)
- Bottom slot cards in the PFD and MFD (for other databases like FliteCharts, SafeTaxi, and Obstacles)
If your cards are not clearly labeled, it's a good idea to mark them before proceeding to avoid confusion during reinstallation.
Step 3: Open the Garmin Aviation Database Manager application.
Launch the Garmin Aviation Database Manager on your computer. From there, select your aircraft and install the required databases onto your SD cards.
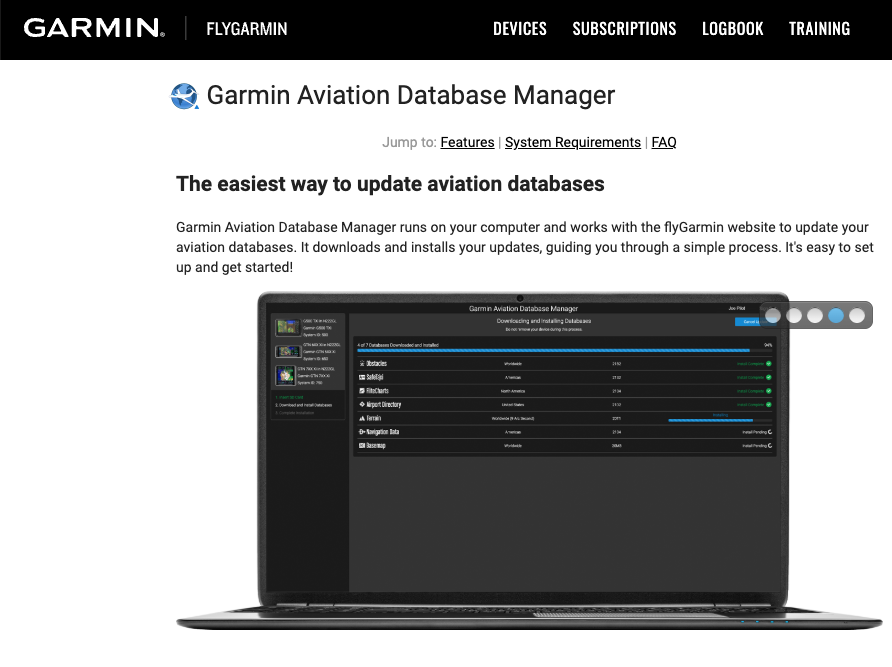
Step 4: Select and Install Databases
Within the Garmin Aviation Database Manager, select the databases you want to update for your aircraft.
This include:
- Navigation Data (NAV)
- FliteCharts
- SafeTaxi
- Obstacles
Follow the prompts in the application to install the selected databases onto the appropriate SD card(s). The application will guide you through which card to use.
Note: Database availability may vary depending on your aircraft configuration and avionics software version.
Step 5: Safely Eject SD Card(s)
Once the installation is complete, safely eject each SD card from your computer using your operating system's eject function.
This helps prevent data corruption and ensures the cards are ready for use in the aircraft.
Step 6: Insert SD Card(s) into the Aircraft
With aircraft power OFF, insert the SD cards back into their proper slots:
- Top slot: Navigation Data card
- Bottom slots: PFD and MFD cards
Step 7: Power On and Confirm Database Update
Turn on the aircraft's battery or avionics power.
The G1000 system will detect the update databases and prompt you to confirm the update. Follow the on-screen instructions and press the appropriate keys (typically ENT) to begin the loading process.
Allow the system to complete the update. This may take several minutes depending on the databases being installed.
Step 8: Complete Any Remaining Prompts
After the initial load, some systems may require an additional step to fully sync navigation data between displays.
If prompted, follow the on-screen instructions to complete the update. Once finished, confirm that both the PFD and MFD display normal operation with current database information.