
How to update your Garmin G1000
Click here for other Garmin instructional videos.
Follow along with our new guide, updated for the Garmin Aviation Database Manager.
2026 Guide: How to Update your Garmin G1000
When updating your G1000, there are two distinct steps.
1. Download Data from Garmin to SD cards.
2. Upload data to the aircraft.
The navigation data base is updated every 28 days by the FAA and this information must be downloaded from the Garmin site to the SD cards in the aircraft and then the card data input to the radio. The entire process is quite straightforward, and putting it into words will take longer to read than perform.
Step 1: Download from Garmin’s website to SD Cards; go to www.flygarmin.com
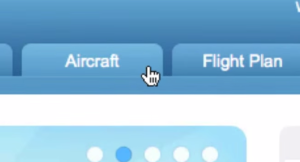
Aircraft tab on Garmin website
Remove the cards from your aircraft and take to your computer. You should have a PFD card in the lower slot of the PFD and an MFD card in the lower slot of the MFD. Label them P and M if they are not already identified clearly. These are special cards. You may have a card in the top slot of the MFD which is for NAV Data. The NAV data card is not special and any generic SD card can be used if it is cleared and formatted.
You will need the Garmin Communicator Plugin or Garmin has a new tool that we have not yet used or documented that only works for PC’s called the Garmin Aviation Database Updater (Beta).
If you are using an Apple Mac for these next steps use Safari as your browser only with the Communicator Plugin.
Sign into your account. You have been provided the account name and sign in information. Go to the Aircraft Tab. Your Aircraft should be set up already for you, but if its not already populated, set up your aircraft. Click on “N” number and click on Data Bases at left side of the box.
In your Aircraft Tab you will see radio buttons on the left side for your G1000 device that list the databases you can download as:
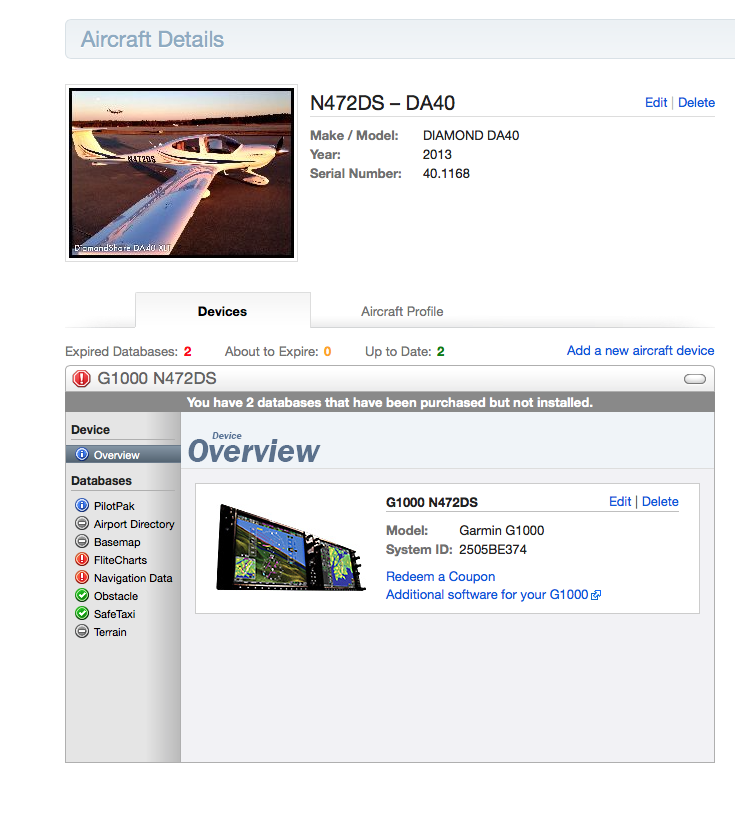
Pilot Pak
- Airport Directory (Only usable with .23 software and only for WAAS equipped Diamond aircraft)
- Base Map (Not typically updated)
- FliteCharts
- Navigation Data (update to top slot NAV card only)
- Obstacles
- SafeTaxi
- Terrain (Not typically updated
Insert the NAV DATA card from the aircraft (from top slot on the MFD or use your own supplied SD card) into the SD reader of your computer.
Back on the Garmin website, Press Install. Follow screen instructions which will find the SD card, then ask to install. Press Install, read and agree to license agreements. When data download says ‘Successfully loaded data’ safely remove NAV DATA card from computer. It is ready for the aircraft.
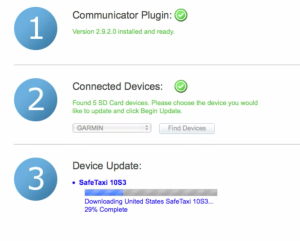
It’s important that your computer stays on and isn’t interrupted while loading an update. When finished you’ll see a green check.
For data bases other than NAV DATA, you will use the lower SD cards from both the PFD and MFD. Insert the MFD SD card into your computer. Select Install for FliteCharts. The next screen will ask if you want to perform BATCH DOWNLOAD. This is the easiest and quickest method provided you have a fast internet connection (for slow connections do them one at a time). The first data base listed will be the one you selected – FliteCharts, and will indicate install. Move the curser down and select the radio button for “Install” on SafeTaxi and Obstacles. DO NOT select to install the Terrain data base. It which should not normally be updated as it is large, does not change and if you select the wrong one it could make your SVT not work if installed. Also the Airport Directory data is only useable if you have a G1000 with system software .23 level so otherwise do not update this data. At bottom of screen select “INSTALL”. Read and agree to the license. Follow screen as it finds the SD card, and watch as it downloads the files selected. The FliteCharts is the biggest file, and may take up to 20 minutes to load. Please keep your computer active during the download, do not allow it to go into ‘sleep’ mode. At conclusion of “Successfully Loaded” select “Back to Device”. Then “eject” the card using the appropriate method for your operating system and safely remove from the computer as it is ready for aircraft.
If you do not have 10.0 rev level or higher system software on your MFD and PFD that support cross card syncing then proceed to repeat the process on the PFD card below.
Install PFD card in computer and follow the same sequence as detailed above for the MFD card. Only load the data as specified above to match what you put on the MFD card and don’t forget to “Eject” your card at the end using the appropriate process for your particular operating system.
On the G-1000 screen verify the appropriate radio buttons are ‘green’ and the message is data base are up to date. If done then sign out of account and exit computer. You now have three complete data cards, one Nav Data, one PFD, one MFD.
Step 2: Load Data into Aircraft
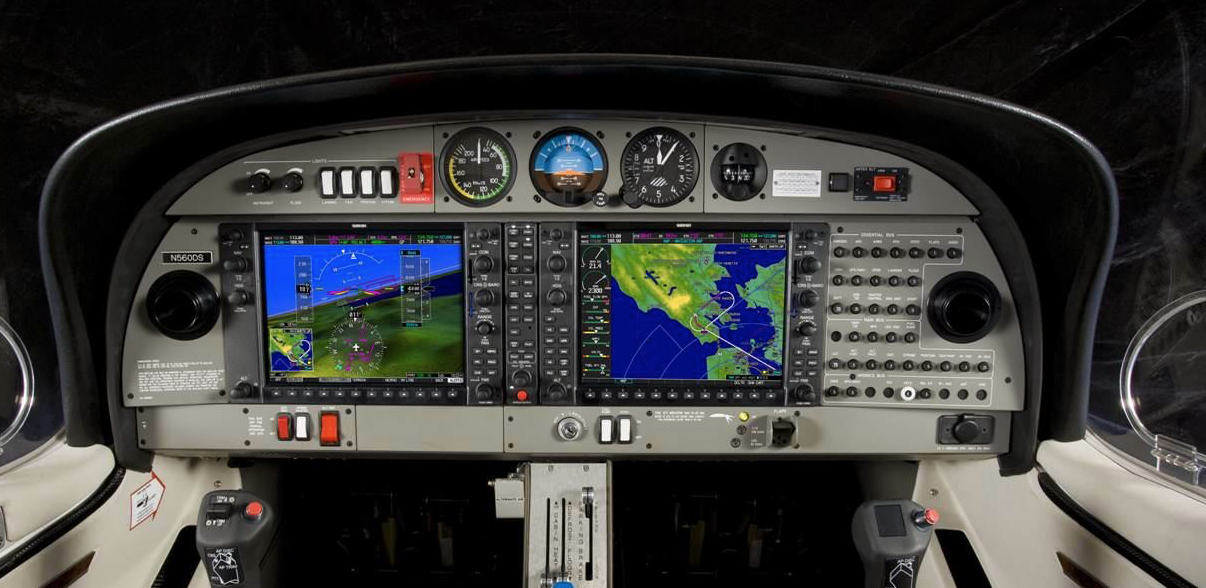
The G-1000 system in the aircraft is made up of a number of redundant computers that are accessed through the four data slots, two in the PFD, two in the MFD. The following procedure is necessary to get the correct data into the correct computer. If not followed, the system goes into a safe mode, and will present error messages and not present flight information. The following instructions are for systems that do not have 10.0 system software and cross syncing enabled.
With aircraft power OFF, insert PFD card into PFD bottom slot and MFD card into MFD bottom slot.
With aircraft power OFF, insert Nav Data card into the top PFD slot.
Turn on aircraft BAT switch.
Message will come up on both the PFD and MFD screens indicating new data has been detected. The question will be asked “do you want to update data?” The response is to press on the PFD the YES or ENT key, AND ONTHE MFD press the YES or ENT key. Both the PFD and MFD must be pressed.
There will be a message indicating data being loaded. At the end of load, it will indicate ‘Successfully loaded’. Press the ENT key on the PFD and press the ENT key on the MFD. The PFD and MFD screens will then load normally, showing what you are accustomed to. When both screens are normal, turn BAT switch OFF.
Remove ONLY the Nav Data card from the top PFD slot, and insert the same Nav Data card into the top MFD slot. Do Not remove the lower cards.
Turn on the BAT switch, and the PFD will come up normally, but the MFD will come with a screen that asks “Do you want to install Nav Data?” Press YES or ENT key on MFD. There will be a message indicating the file is being loaded. At the completion of the load, a message indicating “load completed, select YES to proceed” is displayed. Select YES or ENT to proceed. The MFD screen will then load as normal. Once the normal MFD screen is displayed, remove the Nav Data card from the top slot, and leave in place for safe keeping.
You have now loaded the updated files to the aircraft.
Follow along with our updated guide
Go fly and have fun!
The LifeStyle Aviation Support Team